I love looking at photos that are sharp. I like picking out all the little details in images. Post processing has made it even easier to pull out more detail than ever before. Sharpening is one of the things I get asked about a lot. Sharpening is also one of my key adjustments I do when I process my photos. I decided to share with you some of the basic sharpening tools and effects that I use. If you have a different technique that you would like to share pleas post a comment. I always like to try new things with sharpening.
***
Disclaimer I use an older version of Photoshop mainly because I don't need any other version for what I do. Some of these filters may be named differently.***
Basically there are four different sharpening techniques:
Sharpen, Unsharp Mask, Smart Sharpen, High Pass Sharpen. Sharpening can be very tricky to get right. I recommend sharpening just before your print, or post on facebook, whatever. Sharpening should be the last thing you do to the image. The reason we do this is to avoid haloing or pixelattion from other filters or adjustment. Fix up your photo first, then sharpen. Sharpening is also really hard to get to the right amount. During the editing process our eyes get used to the sharpness of the image which makes it very easy to over sharpen the image. I always make a duplicate layer and toggle the sharpening layer on and off to compare from the original. This helps me keep my sharpening to a minimum while retaining important detail.
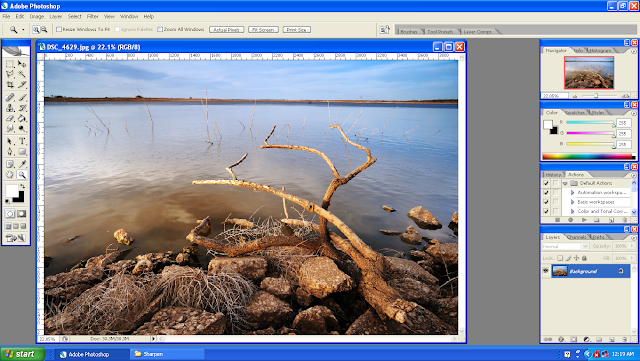 |
| Here is what we will be working with today. This image was captured using my Nikon D700 and my 18-35mm lens. This is a very sharp lens and I get the most out of the 12 megapixel full-frame sensor with this combo. |
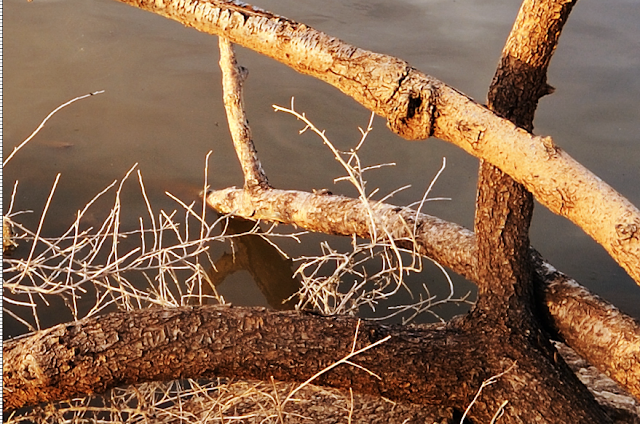 |
Here is a 100% crop of the unsharpened image. As you can tell this photo is already sharp, but I want to sharpen for printing purposes here.
|
1: Sharpen
Filter>Sharpen>Sharpen
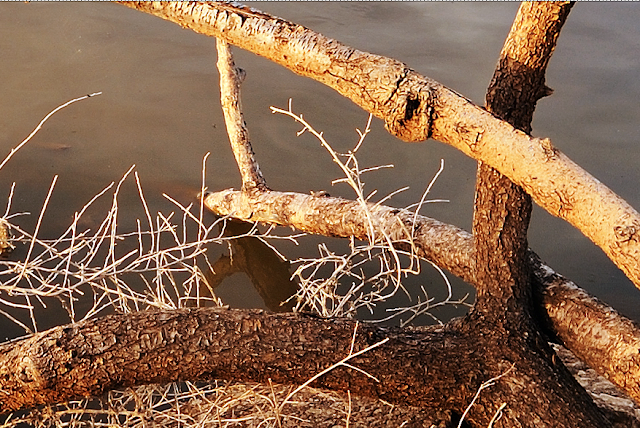 |
| 100% crop using the "Sharpen" filter. This is a very limiting filter You can not change the parameters of the sharpening. Often times this leads to more noise (grain) in the image. It also creates a flat effect on the image. I actually don't ever use this filter, but I felt it necessary since it is one of the most popular way of sharpening a photo. |
2. Unsharp Mask
Filter>Sharpen>Unsharp Mask
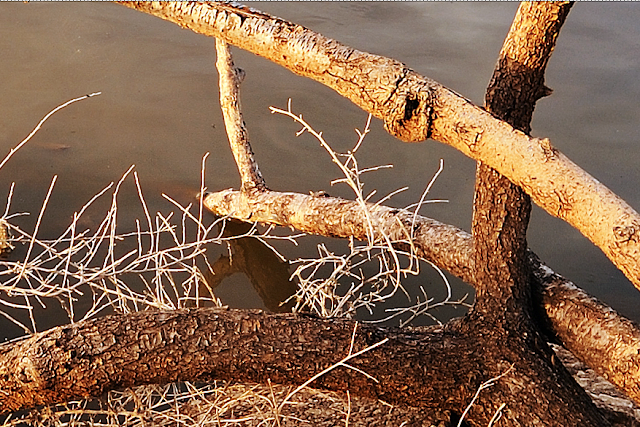 |
| Unsharp Mask is a much better sharpening tool. It males a nice even sharpening throughout the image. This filter was designed for scanned documents and film not for digital images. I used this filter a lot when I first started out using photoshop. |
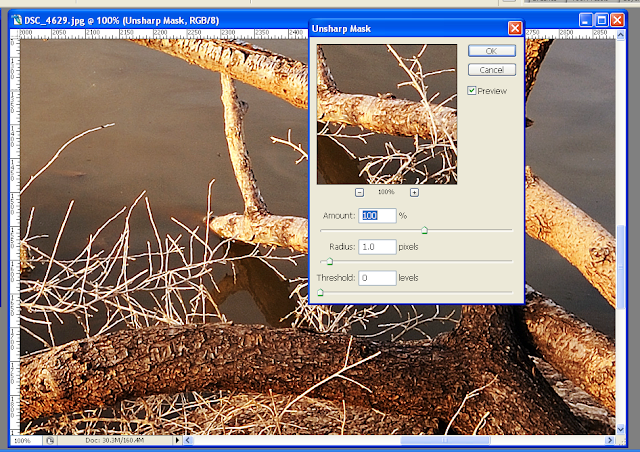 |
This is the Unsharp Mask menu. The menu is made of 3 components Amount, Radius, Threshold. Amount controls the degree of sharpening applied to the image, Radius controls the radius of the sharpening pixels (I always like smaller radii to avoid haloing around the edges) and Threshold controls the level of edge pixels to be sharpened.. Moving this slider can soften some of the edges to avoid haloing.
|
3. Smart Sharpen
Filter>Sharpen>Smart Sharpen
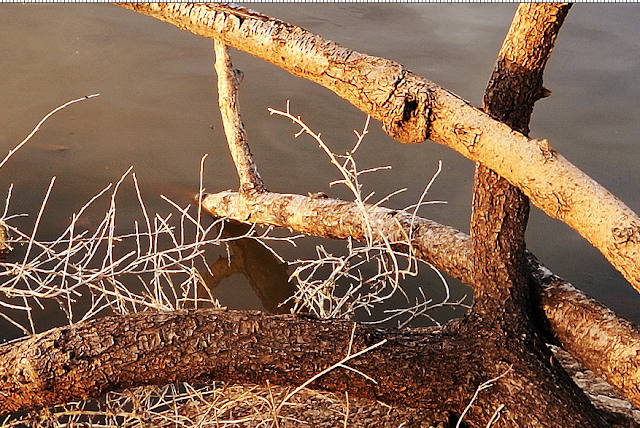 |
| This is by far my favorite form of sharpening. This was designed with digital photographs in mind. This (in my opinion) creates the most effective sharpening effect. Smart Sharpen is a more complicated and involved tool, but the results it produces make it worth the extra work. |
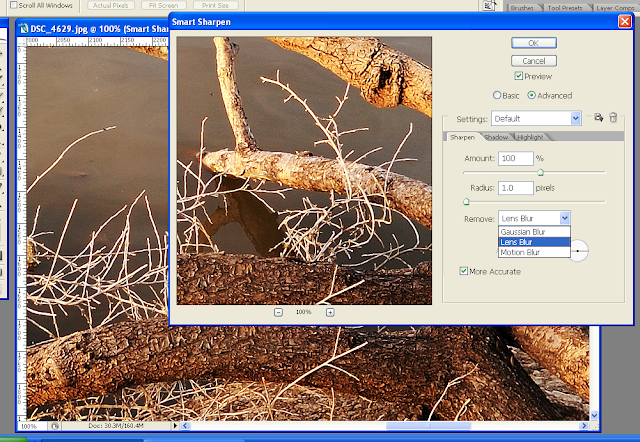 |
| See the menu has a lot more options. The fist step to Smart Sharpen is to change the "Remove" box to Lens Blur. Just like the Unsharp Mask we change the amount, radius, and threshold (available in the advanced menu option. This allows you to control the specific highlight/shadow clop, radius, and tonal range. This can really help when working with photographs that already have higher noise levels.) Also make sure you check the "More Accurate" box. |
 |
It takes a little longer to render, but it is a better result.
|
4. High Pass Sharpening:
Filter>Other>High Pass
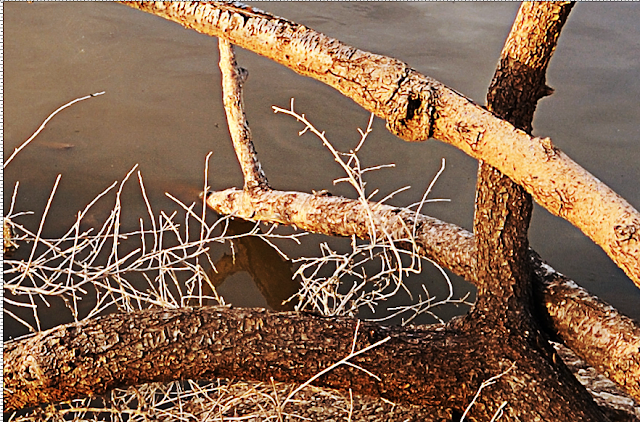 |
| Most people don't know about High Pass sharpening this product isn't even featured under the sharpening window. High Pass sharpening is great for getting detail in the softer parts of the image. Like the Sharpen filter it creates a flat effect. |
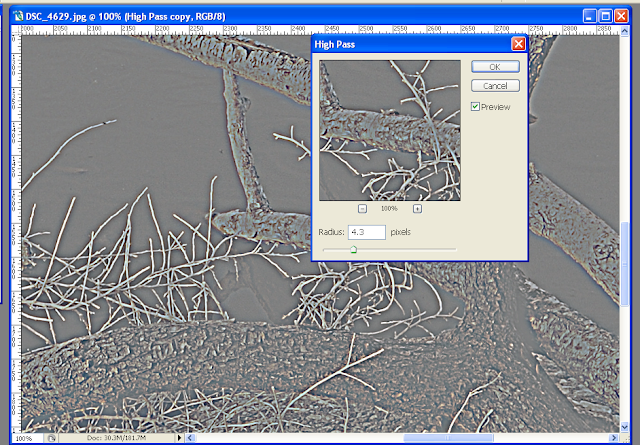 |
| The High Pass menu can be a little confusing. The way it works is a 50% gray fill is placed over the image and the radius adjusted for the desired sharpening effect. Whatever shows through the gray is the area that sharpens. This is excellent for horizons, lines, and softer areas in the image. |
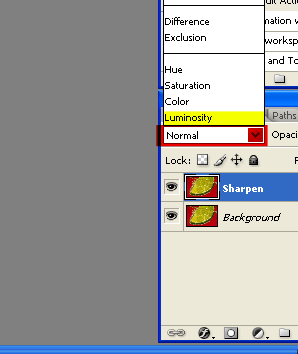 |
| Once the filter is applied you will need to change the blending mode. In you layers palette there is the layer blend mode (shown in red box). Change the filter layer to "Overlay or Soft Light" this sharpens the image but adds very minimal noise (grain). One last thing after you apply your sharpening layer change the blend mode to "Luminosity" this will get rid of any extra haloing or fringing on the sharpened edges. |
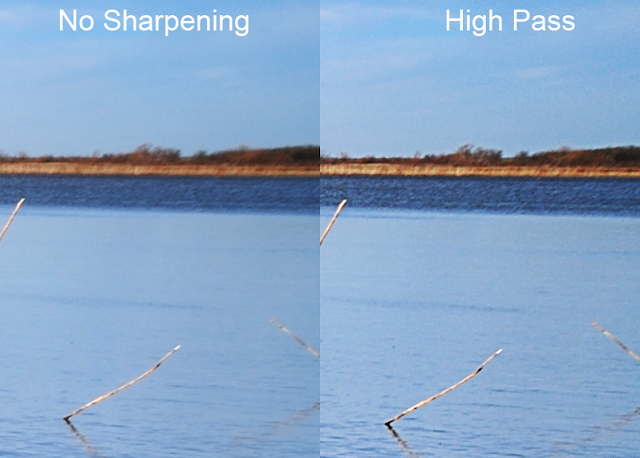 |
| High Pass worked well to sharpen the horizon in this image. |
 |
Here area ll the images compared to each other. My personal favorite is the Smart Sharpen.
|
Conclusion:
I found the most effective form of sharpening to be the "Smart Sharpen" tool. It brought out the most detail while still controlling the noise (grain) levels. However, if I was needing to sharpen the entire image I would use the High Pass.
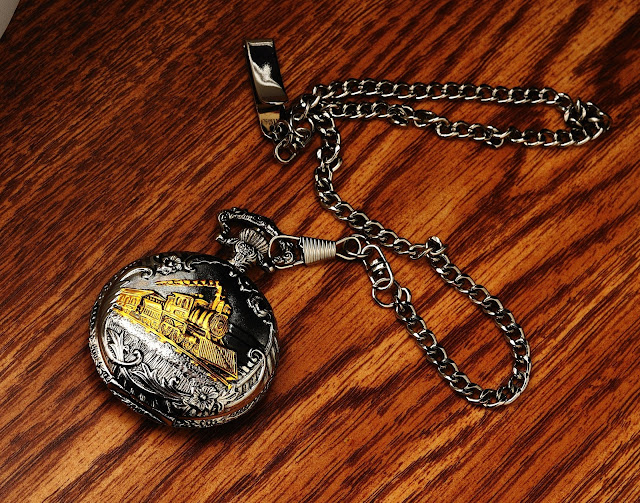 |
| Smart Sharpen is great for bringing out little details. |
 |
| High Pass sharpening works best when sharpening the overall image.. |




No comments:
Post a Comment